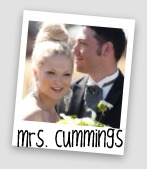
As you know I am very excited about my new button. I have been wanting one for a while and I could never really figure it out…..until NOW 🙂 Anyways, just wanted to share the love for my blogging readers, so here it is: Buttons for EVERYONE!
STEP 1: Create a button image
You can use pretty much anything…..a picture or an image, basically anything that you can identify as a blog trademark. This button is 150×150 megapixels, most buttons are 100×100, keep the size in mind when you create it. No one is going to post a gigantic button on their page 🙂
Step 2: Upload image
After creating your image, upload the image onto your blog. If you are a wordpress user, go to “Media” and “Add New”. Then save the image url which is displayed here:
STEP 3: Create Button Code
Ok, now for the hard part. This might blow your mind a little bit but bear with me 🙂 There are two code “bunches” you need. Haha if my husband read my ridiculous self-made coding terms he would be cringing but this is how I see it!
BUNCH 1: Copy and paste this code onto a word document or sticky note and add your blog address and the image address
<a href=”PASTE YOUR BLOG URL HERE” target=”_blank”><img src=”PASTE IMAGE URL HERE“/></a>
BUNCH 2: Then copy and paste this code below it and paste “Bunch 1” from above in the area indicated. Ok now you have the code you need to create the button!
<textarea readonly rows=”10″ cols=”20″>
PASTE BUNCH 1
</textarea>
STEP 4: Create Text Widget
Alright, let’s put it all together! Create a text widget and paste “Bunch 1” then save. You create the text widget by dragging it onto your side bar (this is for wordpress users). Now go to your page and you should see the image of your button!
Then paste “Bunch 2” right below “Bunch 1”. This is the code for the button text box. This allows readers to copy the code and paste it into their own text widget to display your button. Title the button as you wish….mine says “Grab my button!” Then don’t forget to save it!
Here’s what mine looks like:
And this is my code:
<a href=”https://mrscummingsrx.wordpress.com” target=”_blank”><img src=”http://i1092.photobucket.com/albums/i417/mrscummingsrx/mrscummingsrxbutton-1.jpg” /></a>
<textarea readonly rows=”10″ cols=”20″>
<a href=”https://mrscummingsrx.wordpress.com” target=”_blank”><img src=”http://i1092.photobucket.com/albums/i417/mrscummingsrx/mrscummingsrxbutton-1.jpg” /></a>
</textarea>
Now go to your homepage and admire! You did it! You made a blog button!!
If you already have a blog roll, the button serves a similar purpose. It allows blogging readers to support the blogs they love my posting the button which links readers to your blog. With cute button options, bloggers are more likely to take the button to dress up their sidebar…..so it’s kind of a win-win!
Hope this is helpful! Good luck!


THANK YOU!!!! I thought the only way to get a button was to pay for it. Thank you so much!!
xo
Mindy
Sa-weeet!
This is awesome! LOVE the button! Thank you for sharing this!!! Going to work on my own button soon, maybe we can swap one of these days! 😉
totally have to try this once i find some time.
ITA! Will have to do this once things slow down a bit and I have time. There is never enough time for all the stuff I want to do!!
awww you are tooo sweet! i was just getting ready to scour the internet for a way to make them! your the best!
I am going to have to make notes on that. I wanted to do that very thing to my blog. Sometimes they have to get so ‘techie” that I just decide it really isn’t that important (when it was to me). I love the descriptions and visual images! Thanks!!
This is really informative! Thanks!
i will try this thank you thank you!! :p
i did it almost and hour later lol! but its there! you can see it in my blog! thankkk you
looks great!! you might want to make a smaller one too…or different sizes so people can choose! I really wanna make some more but I just haven’t had time. pretty easy huh?