It’s that time of year again….time to take our hats off to the grads! This year, I am one of those grads….FINALLY. I have been nothing but a student my whole life and now I’m moving on to be a real pharmacist, yay! No more moochin off the hubby, time for this wifey to bring in that bacon 🙂 Well, what better way to start the celebration than announcing your graduation to friends and family!?
Graduation announcements are traditional reminders of commencement. There is a range of options from a fancy embossed announcement from the university or photo announcement with the basic info and a grad pic. These announcements can range from $2-7 each, some being more expensive than wedding invitations!! I’m not rollin in the dough yet, so I’m makin my own announcements, and you can too…..
Here’s what you need:
- White/Cream Cardstock
- Computer Printer and Ink
- Colored Cardstock
- Ribbon
- Hot Glue
- Border Stamp
- Ink Pad
- Embossing Powder
- Envelopes
Step 1: Start by drafting your announcement on word or publisher. There are lots of different formats you can use, here’s the format I used:
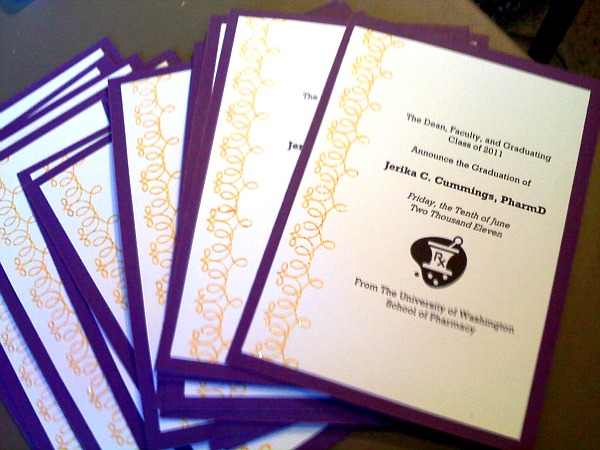
The Dean, Faculty, and Graduating Class of 2011
Announce the Graduation of:
GRADUATE NAME, DEGREE
GRADUATION DATE
From GRADUATE UNIVERSITY
Step 2: Print off the announcements on cardstock. Print extra because between the cutting and stamping you are bound to make some mistakes 🙂
Step 3: Cutting! Now for the fun part….I suggest you set up in your favorite lounger with a good show and bottle of wine because the cutting is the hardest part! Be sure to leave about 1.5-2″ on the margin of the side you plan to stamp the border on. Here are the dimensions I used:
-
Announcement: 4.5″x6.5″
-
Colored Cardstock: 5″x7″
-
Envelopes: 5.5″x7″
Step 4: Stamp your border! You can choose a fancy border like this or something more classic like a dotted or bold line. If you are not into stamping you could easily just run a ribbon along the border!
Step 4b (optional): Embossing! After stamping, spread embossing powder over the ink. I used a clear glitter embossing powder because I love sparkles 🙂 After shaking off the extra powder, heat and watch the stamped image turn begin to glisten!
Step 5: Add backing colored cardstock to announcement using double stick tape. I used about 3-4 strips per card, covering the border sides.
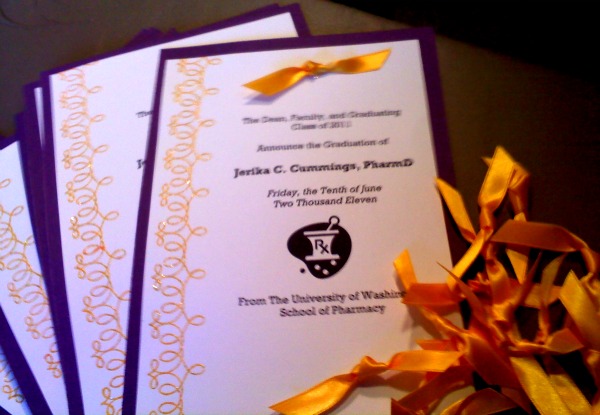
Step 6: Time for ribbon! You can tie bows, or simply tie a knot as I did here. I love adding ribbon to invites and announcements…just gives it a little more personality 🙂 Fasten each ribbon with a dab of hot glue.
NOTE: You will burn your fingers…..but thats life!
Here’s my final product! This took me the daytime portions of my weekend, but I was not very focused and there was a lot of socializing involved 🙂 I’m sure you could bang these out in a night if need-be.
Alright, now you have all the info you need to make your own graduation announcements! What do you think, gonna give it a go?? Would love to see your final product…..send me a pic 🙂
Hats off to the grads of 2011…..WE DID IT!!


Jerika:
These invitations look so great! I’m spreading the word via stumble so more people can benefit from your stylish invites. Cheers, Sarah
They turned out great!
super elegant! i love the stamp detail ^^
Great job, girl! Love ’em!!! ♥
And congrats on your PharmD!
Wow they’re great and Congratulations you! I’ve decided to make all of my Christmas pressies this year and I suspect your blog will be my first port of call for inspiration. Will drfo be trying those lanterns for summer barbeques….ya mon!
I am happy the way these turned out!! Thanks again, Jerika!!
These are amazing! Very talented! Congrats on graduating 🙂
thanks….almost there! 5 days of rotations and then I’m FREE!! well from school. gonna have to start making a living i suppose 😉
These look fantastic!!!! great idea with the stamps!
thanks so much! they were really fun. I’ve been missing mass projects since my wedding…..i need one of my friend’s to get married so I can start the next batch of invitations!!
You make me so mad when you blog about something before i get it in the mail… it ruins the element of surprise!!!
It takes time to get to te middle of nowhere (aka my house)…start factoring that in…
and i havent seen a DIY peacock feather earrings to i am guessing you havent made those yet…
You should be happy I send you ANYTHING 🙂 Love you! Will try to “warn” you next time…
Pingback: Guest Blog: Mrs. Cummings Gets You Going with Lemon Vodka Passionade « OC 2 Seattle